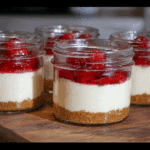
5 Easy High Protein Cheesecake Jars to Try
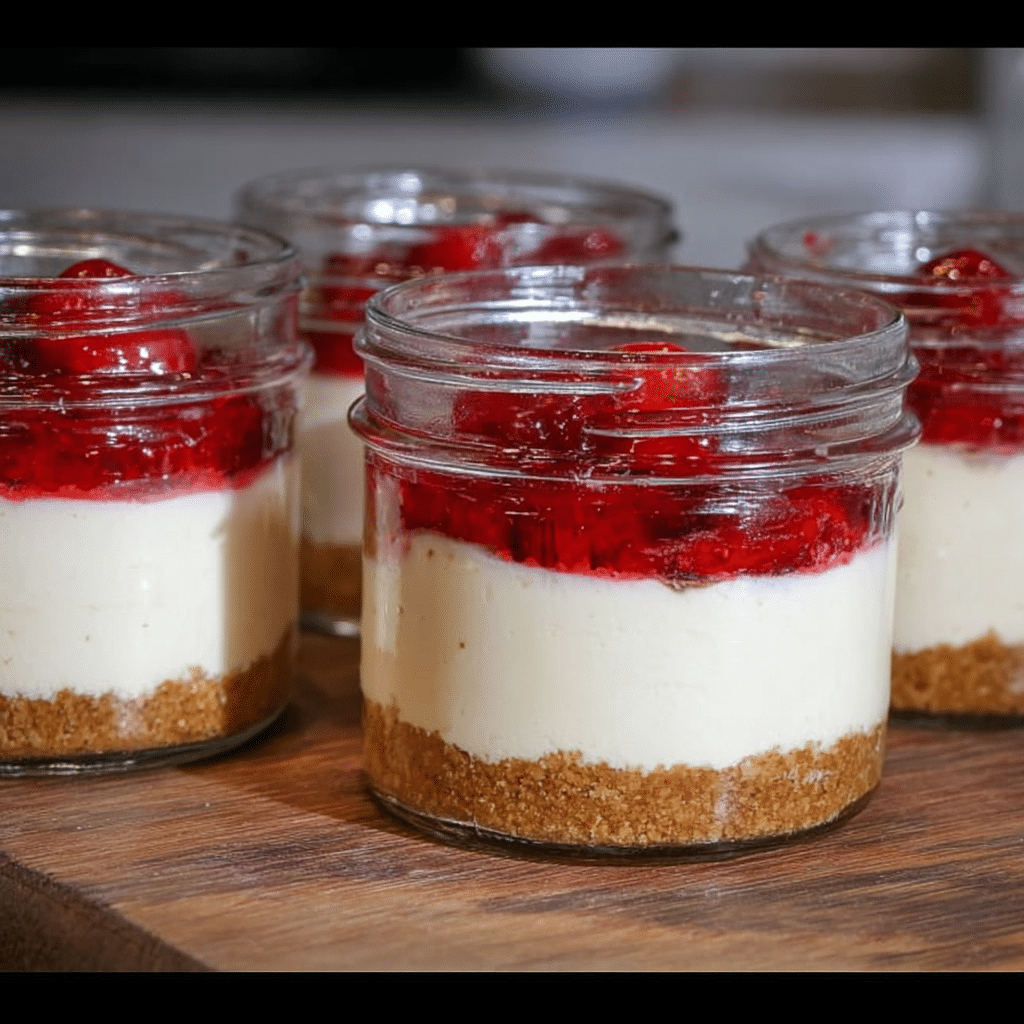
Craving a treat that’s both indulgently creamy and packed with nutrition? These High Protein Cheesecake Jars are exactly what you need. They combine the rich flavors of classic cheesecake with a boost of protein, making them perfect for dessert lovers who want to stay on track with their health goals. Whether it’s a quick snack or a satisfying dessert, these jars deliver layers of taste and texture that’ll keep you coming back for more.
Why You’ll Love This Recipe
- Easy to Prepare: Minimal ingredients and no baking involved make these jars a breeze to whip up.
- Highly Nutritious: Packed with protein and wholesome ingredients, they satisfy your sweet tooth without guilt.
- Perfect Portion Control: Individual jars make it easy to manage portions and grab-and-go snacking.
- Customizable Flavors: Easily adjust the ingredients to suit any flavor preference or dietary need.
- Great For Any Occasion: Ideal for meal prep, parties, or just a cozy night in.
Ingredients You’ll Need
The magic of these high protein cheesecake jars lies in their simple but essential ingredients. Each one plays a crucial role in creating the beautiful balance of creamy texture, flavor, and nutritional punch that makes this recipe shine.
- Cream Cheese: The creamy base that brings richness and smooth texture.
- Greek Yogurt: Adds protein and tanginess while keeping the cheesecake light.
- Protein Powder: Boosts the protein content without overpowering flavor—vanilla works beautifully.
- Honey or Maple Syrup: Natural sweeteners that add gentle sweetness and a luscious finish.
- Crushed Graham Crackers or Oats: Provides a crunchy, buttery base to complement the creamy filling.
- Fresh Berries or Fruit Compote: Adds color, flavor, and extra nutrients for a fresh burst with every bite.
- Chia Seeds or Nuts (optional): For extra texture and healthy fats if you want to mix things up.
Variations for High Protein Cheesecake Jars
One of the best parts about High Protein Cheesecake Jars is how easily you can customize them. Whether you want to tweak ingredients for dietary needs or experiment with flavors, these jars adapt beautifully.
- Chocolate Lover’s Delight: Add cocoa powder to the cream cheese mixture and top with dark chocolate shavings.
- Vegan-Friendly: Use dairy-free cream cheese and plant-based protein powder to keep it vegan and delicious.
- Nut Butter Swirl: Swirl in peanut or almond butter for an extra-rich flavor and creamy texture.
- Tropical Twist: Mix in mango or pineapple chunks for refreshing tropical notes.
- Seasonal Spice: Add cinnamon, nutmeg, or pumpkin pie spice for cozy, seasonal vibes.

How to Make High Protein Cheesecake Jars
Step 1: Prepare the Base
Start by finely crushing your graham crackers or oats. Press them into the bottom of each jar to create a sturdy, crunchy foundation. This not only adds texture but also balances out the creamy topping.
Step 2: Mix the Cheesecake Filling
In a large mixing bowl, combine softened cream cheese, Greek yogurt, protein powder, and your chosen sweetener. Beat them until smooth and creamy—no lumps allowed! This mixture is the heart of your cheesecake jars.
Step 3: Assemble the Jars
Spoon the filling over the prepared crust layer in each jar. Smooth the tops with the back of a spoon or spatula for a clean finish, then add layers of fresh berries or fruit compote for a burst of flavor and color.
Step 4: Chill and Set
Place the jars in the refrigerator for at least 2 hours to let the cheesecake filling firm up and allow those flavors to meld perfectly. The chilling step is essential for the ideal creamy texture.
Step 5: Add Final Touches
Before serving, sprinkle optional toppings like nuts, chia seeds, or dark chocolate shavings to boost texture and visual appeal.
Pro Tips for Making High Protein Cheesecake Jars
- Use Full-Fat Cream Cheese: It helps achieve the smoothest and creamiest texture.
- Soften Ingredients: Make sure your cream cheese and yogurt are room temperature for easier blending.
- Choose a Mild Protein Powder: Vanilla or unflavored powders blend best without altering taste.
- Layer Wisely: Keep crust compact and filling smooth to ensure every spoonful has a perfect balance.
- Chill Overnight: For the best texture and flavor development, refrigerate the jars overnight if possible.
How to Serve High Protein Cheesecake Jars
Garnishes
Fresh fruits like raspberries, blueberries, or sliced strawberries add bright color and natural sweetness. A sprinkle of crushed nuts or a drizzle of honey can elevate the look and taste even more.
Side Dishes
Pair these jars with a fresh green salad for a light lunch or alongside a hot cup of herbal tea to make dessert time truly relaxing.
Creative Ways to Present
Serve the cheesecake jars in mini mason jars or clear glass cups to highlight their pretty layers. Tie twine or place a cute label on each jar for gifting or parties to impress guests effortlessly.
Make Ahead and Storage
Storing Leftovers
Store the jars covered in the refrigerator for up to 4 days. Keeping them chilled maintains that irresistible creamy texture and freshness.
Freezing
You can freeze the jars for up to 1 month. Thaw overnight in the fridge before serving to preserve flavors and consistency.
Reheating
Since cheesecake jars are meant to be enjoyed cold, avoid reheating. Simply allow frozen jars to gradually thaw in the refrigerator for best results.
FAQs
Can I use regular yogurt instead of Greek yogurt?
Yes, but Greek yogurt is recommended for its thicker texture and higher protein content, which makes the cheesecake firmer and more nutritious.
What type of protein powder works best?
Vanilla-flavored or unflavored whey or plant-based protein powders blend well and keep the flavor balanced without adding grit.
Are these jars suitable for meal prep?
Absolutely! High Protein Cheesecake Jars are perfect for prepping in advance and grabbing for healthy snacks or desserts throughout the week.
Can I make these jars dairy-free?
Yes, substitute cream cheese and Greek yogurt with dairy-free alternatives like cashew-based spreads and coconut yogurt to keep them vegan and delicious.
How long do the jars last in the fridge?
They stay fresh and tasty for about 4 days when stored properly in airtight containers.
Final Thoughts
If you’ve been searching for a delicious, protein-packed treat that satisfies your sweet cravings without the guilt, these High Protein Cheesecake Jars are an absolute game changer. Easy to make, fully customizable, and bursting with both flavor and nutrients, they’re sure to become a fast favorite in your recipe rotation. Give them a try and watch how these little jars of joy brighten up your day!
Related Posts
- Why Nestlé Toll House Death by Chocolate Cake Wins Hearts
- Why Old Fashioned Orange Candy Melts Hearts
- Irresistible Oatmeal Raisin Cookie Bars Recipe
High Protein Cheesecake Jars
High Protein Cheesecake Jars offer a creamy, indulgent dessert packed with protein and wholesome ingredients. These no-bake jars combine the rich flavors of classic cheesecake with a healthy boost, perfect for portion-controlled, nutritious snacks or desserts. Easy to customize and prepare, they’re ideal for meal prep, parties, or a cozy treat at home.
- Prep Time: 15 minutes
- Cook Time: 0 minutes
- Total Time: 2 hours 15 minutes
- Yield: 4 jars 1x
- Category: Dessert
- Method: No-Bake
- Cuisine: American
- Diet: Gluten Free
Ingredients
Base
- 1 cup crushed graham crackers or oats
Cheesecake Filling
- 8 oz (225g) cream cheese, softened
- 1 cup Greek yogurt, softened
- 1/2 cup vanilla protein powder
- 2–3 tablespoons honey or maple syrup (adjust to taste)
Toppings
- 1/2 cup fresh berries or fruit compote
- Optional: 1 tablespoon chia seeds or nuts
Instructions
- Prepare the Base: Finely crush the graham crackers or oats and press them firmly into the bottom of each jar to create a crunchy foundation that balances the creamy filling.
- Mix the Cheesecake Filling: In a large bowl, combine softened cream cheese, Greek yogurt, protein powder, and your chosen sweetener. Beat the mixture until it’s smooth, creamy, and free of lumps.
- Assemble the Jars: Spoon the filling over the crust layer in each jar, smoothing the top with a spoon or spatula. Add layers of fresh berries or fruit compote to introduce flavor and color.
- Chill and Set: Refrigerate the jars for at least 2 hours to allow the filling to firm up and the flavors to meld, resulting in the perfect creamy texture.
- Add Final Touches: Before serving, sprinkle optional toppings like nuts, chia seeds, or dark chocolate shavings to enhance texture and visual appeal.
Notes
- Use full-fat cream cheese for the creamiest texture.
- Soften cream cheese and yogurt to room temperature before mixing for easier blending.
- Choose a mild vanilla or unflavored protein powder to avoid altering taste.
- Keep the base layer compact and the filling smooth for perfect spoonfuls.
- Chill jars overnight for best texture and flavor development.
Nutrition
- Serving Size: 1 jar (approx. 150g)
- Calories: 280
- Sugar: 12g
- Sodium: 150mg
- Fat: 12g
- Saturated Fat: 7g
- Unsaturated Fat: 4g
- Trans Fat: 0g
- Carbohydrates: 22g
- Fiber: 3g
- Protein: 20g
- Cholesterol: 45mg
Keywords: high protein dessert, cheesecake jars, no bake cheesecake, healthy dessert, protein snack, greek yogurt dessert, easy cheesecake recipe