How to Make Homemade Vanilla Ice Cream Easily

If you’ve ever dreamed of whipping up creamy, luscious Homemade Vanilla Ice Cream without any fuss, you’re in the right place. This classic treat is surprisingly simple to make using a handful of straightforward ingredients, and the result is a rich, velvety dessert bursting with authentic vanilla flavor. Whether you’re a beginner or a seasoned kitchen pro, this easy Homemade Vanilla Ice Cream recipe will quickly become your go-to for satisfying sweet cravings and impressing friends and family.
Why You’ll Love This Recipe
- Simple Ingredients: Uses everyday pantry staples to create a deliciously fresh ice cream base.
- Quick Preparation: Minimal prep time means you can enjoy your homemade treat in just a few hours.
- Rich and Creamy Texture: Perfectly balanced ingredients create a smooth, dreamy mouthfeel every time.
- Customizable Flavors: A versatile base that lets you add your favorite mix-ins or twists with ease.
- No Special Equipment Needed: You can make it easily with or without an ice cream maker.
Ingredients You’ll Need
The magic of Homemade Vanilla Ice Cream comes alive with just a few simple ingredients, each playing a key role in flavor, texture, and color. Here’s what you’ll need to get started:
- Whole Milk: Provides creaminess and balance without heaviness.
- Heavy Cream: Adds richness and smooth texture to every scoop.
- Granulated Sugar: Sweetens the ice cream perfectly without overpowering the vanilla.
- Vanilla Bean or Extract: The star ingredient; real vanilla bean gives the most nuanced flavor, but pure extract works wonderfully too.
- Egg Yolks: Help thicken and create a custardy base for that classic ice cream consistency.
- Salt: Just a pinch to enhance all the flavors and bring out the sweetness.
Variations for Homemade Vanilla Ice Cream
One of the best parts about Homemade Vanilla Ice Cream is how adaptable it is. Feel free to experiment with these variations to personalize your batch or cater to dietary preferences:
- Vegan Version: Use coconut milk and cashew cream instead of dairy for a luscious plant-based alternative.
- Extra Vanilla Punch: Add a splash of vanilla bean paste or scrape in more vanilla seeds for intensified flavor.
- Mix-Ins: Stir in chocolate chips, crushed cookies, or fresh fruit right before freezing for added texture and taste.
- Low-Sugar Option: Substitute sugar with natural sweeteners like honey or agave syrup for a healthier twist.
- Chocolate Vanilla Swirl: Drop in some melted dark chocolate to create dreamy ribbons of chocolate throughout.

How to Make Homemade Vanilla Ice Cream
Step 1: Prepare the Custard Base
Start by heating the whole milk, heavy cream, and half the sugar in a saucepan over medium heat until the mixture is warm but not boiling. This gentle heating helps dissolve the sugar and infuse the cream with sweet flavor.
Step 2: Whisk Egg Yolks and Sugar
While the cream mixture heats, whisk the egg yolks and remaining sugar vigorously in a separate bowl until pale and thick. This crucial step creates a smooth, custard-like texture in your ice cream base.
Step 3: Temper the Eggs
Slowly pour a small amount of the warm cream into the egg yolk mixture while whisking continuously to gently raise the temperature without scrambling the eggs. Then, gradually blend all the yolk mixture back into the saucepan with the rest of the warm cream.
Step 4: Cook the Custard
Return the saucepan to low heat and stir constantly with a wooden spoon or spatula until the custard thickens enough to coat the back of the spoon, about 170-175°F (77-80°C). Be patient; this step ensures a creamy, stable base.
Step 5: Infuse Vanilla and Chill
Remove from heat and stir in your vanilla bean seeds or extract along with a pinch of salt. Transfer the mixture to a bowl, cover with plastic wrap directly on the surface to prevent skin formation, and chill thoroughly in the fridge for at least 4 hours or overnight.
Step 6: Churn and Freeze
Pour the chilled custard into your ice cream maker and churn according to your machine’s instructions until it reaches soft-serve consistency. If you don’t have an ice cream maker, simply pour the custard into a shallow container and freeze, stirring vigorously every 30 minutes to break up ice crystals until firm.
Pro Tips for Making Homemade Vanilla Ice Cream
- Use Fresh Ingredients: The quality of your milk, cream, and vanilla make a huge difference in flavor.
- Be Patient with Chilling: Properly chilled custard results in better texture and freeze quality.
- Don’t Skip Tempering: Gradually warming the eggs prevents curdling and creates smooth custard.
- Stir During Freezing: If not using a machine, frequent stirring prevents ice crystals and keeps it creamy.
- Customize with Mix-Ins Last: Add chocolates, nuts, or fruit after churning for even distribution.
How to Serve Homemade Vanilla Ice Cream
Garnishes
Delight in simple garnishes like fresh berries, a drizzle of caramel or chocolate sauce, or a sprinkle of toasted nuts that complement the rich vanilla flavor without overpowering it.
Side Dishes
Serve your Homemade Vanilla Ice Cream alongside warm desserts like apple pie, brownies, or freshly baked cobblers for a classic, crowd-pleasing combination.
Creative Ways to Present
For an eye-catching twist, serve ice cream in waffle cones, edible cookie cups, or layered parfait glasses topped with whipped cream and colorful sprinkles.
Make Ahead and Storage
Storing Leftovers
Store any leftover Homemade Vanilla Ice Cream in an airtight container with a layer of parchment paper on top to prevent ice crystals and maintain freshness for up to two weeks.
Freezing
If you want to prepare the custard base in advance, freeze it after thorough chilling, then thaw in the fridge before churning to minimize ice crystal formation.
Reheating
Unlike many dishes, ice cream is best served cold; let it soften at room temperature for 5-10 minutes if too hard, but avoid reheating to preserve texture and flavor.
FAQs
Can I make Homemade Vanilla Ice Cream without an ice cream maker?
Absolutely! You can freeze the custard in a shallow container and stir every 30 minutes to mimic churning, resulting in smooth, creamy ice cream without special equipment.
What is the best vanilla to use in this recipe?
Real vanilla bean pods offer the richest, most aromatic flavor and tiny vanilla flecks, but pure vanilla extract is a great and accessible alternative that still yields excellent results.
Can I make this recipe dairy-free?
Yes! Substitute dairy milk and cream with coconut milk, almond milk, or cashew cream to create a delicious vegan Homemade Vanilla Ice Cream version.
How long does Homemade Vanilla Ice Cream last in the freezer?
When properly stored in an airtight container, your ice cream can remain fresh and flavorful for up to two weeks without losing quality.
Why did my ice cream turn out icy instead of creamy?
This usually happens due to insufficient churning or chilling, or because of too much water content—following the recipe closely and stirring during freezing for no machine methods helps achieve the perfect creamy texture.
Final Thoughts
Making your own Homemade Vanilla Ice Cream is not only incredibly satisfying but also opens endless doors for delicious customization. With this easy recipe and a little love, you can enjoy fresh, creamy ice cream right from your kitchen anytime. So go ahead, give it a try, and treat yourself to your new favorite homemade indulgence!
Related Posts
- How to Make Perfect Hawaiian Banana Bread
- Why Chocolate Protein Pudding Boosts Your Snack Time
- Easy No Bake Berry Icebox Cake to Try Today
Homemade Vanilla Ice Cream
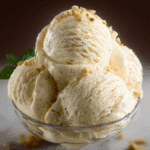
This easy and classic Homemade Vanilla Ice Cream recipe delivers a rich, creamy, and velvety dessert bursting with authentic vanilla flavor. Made with simple pantry staples and minimal prep time, it’s perfect for beginners and experienced cooks alike. Enjoy a customizable base perfect for mix-ins or dietary adaptations, with or without an ice cream maker.
- Prep Time: 15 minutes
- Cook Time: 20 minutes
- Total Time: 4 hours 35 minutes
- Yield: About 1 quart (4 cups) 1x
- Category: Dessert
- Method: No Bake
- Cuisine: American
- Diet: Gluten Free
Ingredients
Main Ingredients
- 2 cups Whole Milk
- 1 cup Heavy Cream
- 3/4 cup Granulated Sugar (divided)
- 1 Vanilla Bean (split and seeds scraped) or 2 tsp Pure Vanilla Extract
- 5 Large Egg Yolks
- Pinch of Salt
Variations
- Vegan Version: Substitute 2 cups coconut milk and 1 cup cashew cream for dairy
- Extra Vanilla Punch: Add 1 tsp vanilla bean paste or extra vanilla seeds
- Mix-Ins (optional): chocolate chips, crushed cookies, fresh fruit
- Low-Sugar Option: Replace granulated sugar with honey or agave syrup to taste
- Chocolate Vanilla Swirl: Add melted dark chocolate ribbons before freezing
Instructions
- Prepare the Custard Base: Heat whole milk, heavy cream, and half of the sugar in a saucepan over medium heat until warm but not boiling, dissolving sugar and infusing cream.
- Whisk Egg Yolks and Sugar: In a separate bowl, whisk egg yolks with the remaining sugar vigorously until the mixture is pale and thick, forming a smooth base.
- Temper the Eggs: Slowly add a small amount of the warm cream mixture into the egg yolks while whisking continuously to raise temperature gently without scrambling eggs. Then pour all the yolk mixture back into the saucepan with the cream.
- Cook the Custard: Return saucepan to low heat and stir constantly until custard thickens enough to coat the back of a spoon, reaching about 170-175°F (77-80°C).
- Infuse Vanilla and Chill: Remove from heat, stir in vanilla bean seeds or extract and a pinch of salt. Transfer to a bowl, cover surface with plastic wrap to prevent skin formation, and chill in the refrigerator for at least 4 hours or overnight.
- Churn and Freeze: Pour chilled custard into an ice cream maker and churn per manufacturer instructions until reaching soft-serve consistency. Without an ice cream maker, pour custard into a shallow container and freeze, stirring vigorously every 30 minutes until firm.
Notes
- Use the freshest milk, cream, and vanilla for optimal flavor.
- Properly chilling the custard improves texture and freezing quality.
- Tempering the eggs prevents curdling and ensures smooth custard.
- If not using an ice cream maker, frequent stirring during freezing prevents ice crystals.
- Add chocolates, nuts, or fruits after churning for even mix-in distribution.
Nutrition
- Serving Size: 1/2 cup
- Calories: 250
- Sugar: 20g
- Sodium: 40mg
- Fat: 18g
- Saturated Fat: 11g
- Unsaturated Fat: 6g
- Trans Fat: 0g
- Carbohydrates: 22g
- Fiber: 0g
- Protein: 3g
- Cholesterol: 115mg
Keywords: vanilla ice cream, homemade ice cream, custard ice cream, no ice cream maker, classic dessert, creamy ice cream