How to Make Easter Bunny Coconut Tails
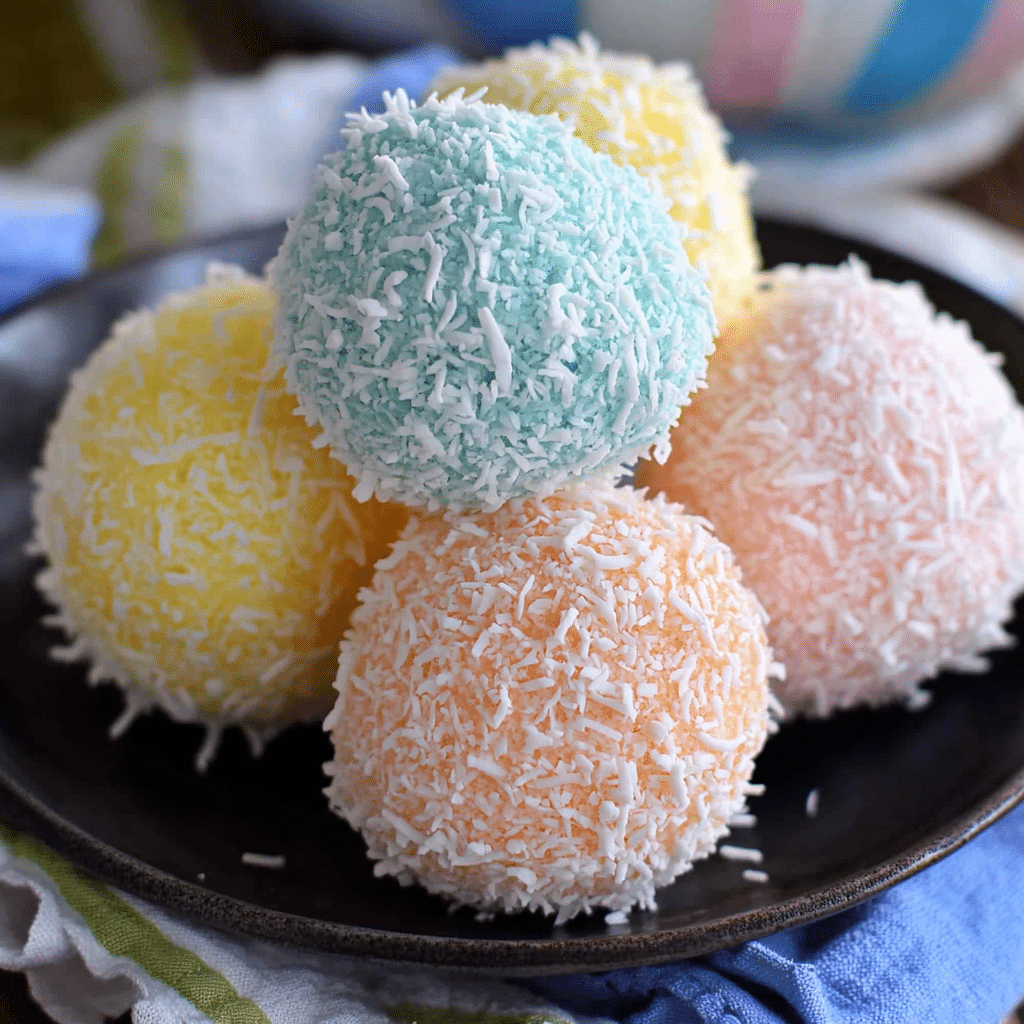
If you’re looking for a sweet, festive treat that’s both charming and delicious, Easter Bunny Coconut Tails are exactly what you need. These delightful bites combine the chewy texture of shredded coconut with sweet, creamy flavors—all shaped into adorable bunny tails perfect for holiday celebrations and family gatherings. Whether you’re crafting a centerpiece for your Easter dessert table or searching for a fun activity to do with kids, learning how to make Easter Bunny Coconut Tails will add a burst of joy and flavor to your festivities.
Why You’ll Love This Recipe
- Simple Ingredients: Uses pantry staples, making it easy to prepare without special shopping trips.
- Kid-Friendly Fun: Shaping the tails is a creative activity kids will love joining in on.
- Perfectly Festive: The coconut texture and cute design bring the perfect Easter vibe to your treats.
- Customizable Flavors: Easily adapt the recipe with added flavors or coatings to suit your taste.
- Great for Parties: These petite sweets are bite-sized and shareable, ideal for holiday gatherings.
Ingredients You’ll Need
Gathering the right ingredients ensures your Easter Bunny Coconut Tails have the perfect balance of sweet, creamy, and crunchy texture. Each component plays a key role in crafting these festive little treats.
- Shredded Coconut: Use unsweetened or sweetened based on your preference, for the signature chewy texture.
- Sweetened Condensed Milk: Acts as a sticky binder and adds luscious sweetness.
- Vanilla Extract: Enhances the coconut’s natural flavor with warm, aromatic depth.
- Powdered Sugar: For dusting or gentle sweetness on the exterior of the tails.
- White Chocolate or Candy Melts: Optional for dipping or drizzling to add a creamy finish.
- Mini Marshmallows or Candy Pieces: Perfect for creating bunny tails or decorative touches.
Variations for Easter Bunny Coconut Tails
One of the best things about Easter Bunny Coconut Tails is how easy it is to tweak and personalize them. Whether you want to watch sugar intake or experiment with flavors, these ideas will inspire you to make the recipe your own.
- Chocolate Coconut Tails: Add cocoa powder or use dark chocolate for a richer flavor profile.
- Nutty Twist: Mix in chopped almonds or pecans to add crunch and depth.
- Vegan Version: Substitute condensed milk with coconut cream and use dairy-free chocolate.
- Citrus Infusion: Add a touch of lemon or orange zest to brighten the coconut’s flavor.
- Sprinkle Decorations: Customize with colorful sprinkles or edible glitter for festive flair.

How to Make Easter Bunny Coconut Tails
Step 1: Combine the Ingredients
In a large mixing bowl, combine shredded coconut, sweetened condensed milk, and vanilla extract. Mix well until the coconut is fully coated and sticky enough to hold its shape.
Step 2: Form the Bunny Tails
Using your hands, scoop small amounts of the mixture and roll them into bite-sized oval shapes that resemble little fluffy tails. If you want, press a mini marshmallow or candy piece onto one side to mimic the bunny’s cotton tail.
Step 3: Chill to Set
Place the formed coconut tails on a parchment-lined tray and refrigerate for at least one hour. This helps them firm up and makes them easier to handle and serve.
Step 4: Optional Chocolate Dip
If desired, melt white chocolate or candy melts in a microwave-safe bowl, then dip the ears or bottoms of the coconut tails into the chocolate. Place them back on parchment paper to set.
Step 5: Add Finishing Touches
Dust the coconut tails lightly with powdered sugar or add sprinkles to make them extra festive. Let any chocolate coatings fully harden before serving.
Pro Tips for Making Easter Bunny Coconut Tails
- Use Fresh Coconut: Freshly shredded coconut offers the best texture and flavor, but packaged works well too.
- Keep Hands Moist: To prevent sticking, lightly wet your hands before rolling the mixture into tails.
- Chill Thoroughly: Don’t skip the chilling step; it ensures the tails hold their shape perfectly.
- Try Different Sizes: Make a variety of bite-sized versions or larger ones for sharing.
- Store Properly: Keep coconut tails in an airtight container to maintain freshness and chewiness.
How to Serve Easter Bunny Coconut Tails
Garnishes
Sprinkle powdered sugar, edible glitter, or pastel-colored sprinkles over the coconut tails for a fun and eye-catching presentation perfect for Easter tables. Adding tiny candy eyes or small marshmallows can also bring a cute bunny vibe to the treats.
Side Dishes
Pair Easter Bunny Coconut Tails with fresh fruit platters, pastel-colored cupcakes, or light, refreshing beverages like homemade lemonade or fruit-infused iced tea to balance the sweet coconut goodness.
Creative Ways to Present
Arrange the tails on a cupcake stand or in small decorative Easter baskets. Adding grass-like shredded paper beneath creates an adorable “nest” effect. You can also skewer them on sticks to create coconut tail pops, making it easier for guests to grab and enjoy.
Make Ahead and Storage
Storing Leftovers
Keep your Easter Bunny Coconut Tails fresh by storing them in an airtight container at room temperature for up to 3 days or in the refrigerator for up to a week.
Freezing
For longer storage, freeze the tails in a single layer on a baking sheet before transferring to a freezer-safe container. They can be frozen for up to two months and thawed overnight in the fridge before serving.
Reheating
These treats are best enjoyed cold or at room temperature, so reheating isn’t necessary, but if you prefer a softer coconut tail, allow them to sit at room temperature for 15-20 minutes before eating.
FAQs
Can I use unsweetened shredded coconut for this recipe?
Yes! Using unsweetened shredded coconut makes the Easter Bunny Coconut Tails less sweet and lets you control the sugar level, but you might want to add a touch more sweetened condensed milk or powdered sugar.
How long do Easter Bunny Coconut Tails last?
Stored in an airtight container, they stay fresh for up to a week in the fridge or about three days at room temperature. For longer freshness, freezing is recommended.
Are Easter Bunny Coconut Tails gluten-free?
Absolutely! This recipe contains no gluten ingredients by default, making it a safe and tasty option for gluten-free diets.
Can I make these coconut tails ahead of time?
Yes! They hold up well when prepared a day or two before your event, making them a convenient, stress-free addition to your holiday plans.
What’s the best way to shape the tails?
Wet your hands slightly or use a small cookie scoop to form the mixture into oval shapes easily and prevent sticking. Little marshmallows or candy pieces can be gently pressed on for decoration.
Final Thoughts
Trying your hand at making Easter Bunny Coconut Tails is a delightful way to add a whimsical, sweet touch to your Easter celebrations. The simplicity of the ingredients combined with the fun of shaping and decorating makes this recipe a keeper year after year. Gather your loved ones in the kitchen, share a few laughs, and enjoy the festive sweetness that these charming treats bring to your holiday table.
Related Posts
PrintEaster Bunny Coconut Tails
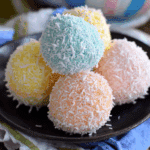
Easter Bunny Coconut Tails are charming, bite-sized treats combining chewy shredded coconut with sweet, creamy condensed milk and vanilla, shaped into adorable bunny tails perfect for festive Easter celebrations and family fun.
- Prep Time: 15 minutes
- Cook Time: 0 minutes
- Total Time: 1 hour 15 minutes
- Yield: About 20-24 tails 1x
- Category: Appetizers
- Method: No-bake
- Cuisine: American
- Diet: Gluten Free
Ingredients
Main Ingredients
- 2 cups shredded coconut (unsweetened or sweetened, based on preference)
- 1/2 cup sweetened condensed milk
- 1 teaspoon vanilla extract
- Powdered sugar (for dusting)
Optional Ingredients
- White chocolate or candy melts (for dipping or drizzling)
- Mini marshmallows or candy pieces (for bunny tail decoration)
Instructions
- Combine the Ingredients: In a large mixing bowl, combine shredded coconut, sweetened condensed milk, and vanilla extract. Mix well until the coconut is fully coated and sticky enough to hold its shape.
- Form the Bunny Tails: Using your hands, scoop small amounts of the mixture and roll them into bite-sized oval shapes that resemble little fluffy tails. If desired, press a mini marshmallow or candy piece onto one side to mimic the bunny’s cotton tail.
- Chill to Set: Place the formed coconut tails on a parchment-lined tray and refrigerate for at least one hour. This helps them firm up and makes them easier to handle and serve.
- Optional Chocolate Dip: If desired, melt white chocolate or candy melts in a microwave-safe bowl, then dip the ears or bottoms of the coconut tails into the chocolate. Place them back on parchment paper to set.
- Add Finishing Touches: Dust the coconut tails lightly with powdered sugar or add sprinkles to make them extra festive. Let any chocolate coatings fully harden before serving.
Notes
- Use freshly shredded coconut if possible for best texture and flavor, but packaged coconut works well too.
- Keep hands slightly moist before shaping to prevent sticking.
- Do not skip chilling; it helps the tails hold their shape.
- Create various sizes from bite-sized to larger sharing portions.
- Store in an airtight container to retain freshness and chewiness.
Nutrition
- Serving Size: 1 tail (approximate)
- Calories: 90
- Sugar: 12g
- Sodium: 10mg
- Fat: 4g
- Saturated Fat: 3.5g
- Unsaturated Fat: 0.5g
- Trans Fat: 0g
- Carbohydrates: 12g
- Fiber: 1g
- Protein: 1g
- Cholesterol: 5mg
Keywords: Easter treat, coconut bites, no bake dessert, kid friendly, holiday sweets, festive snacks