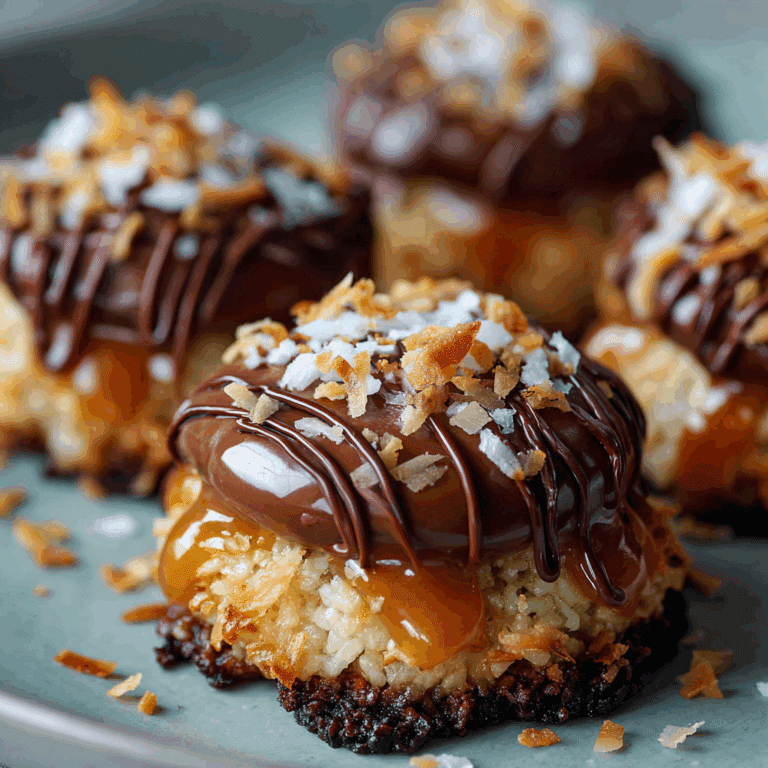
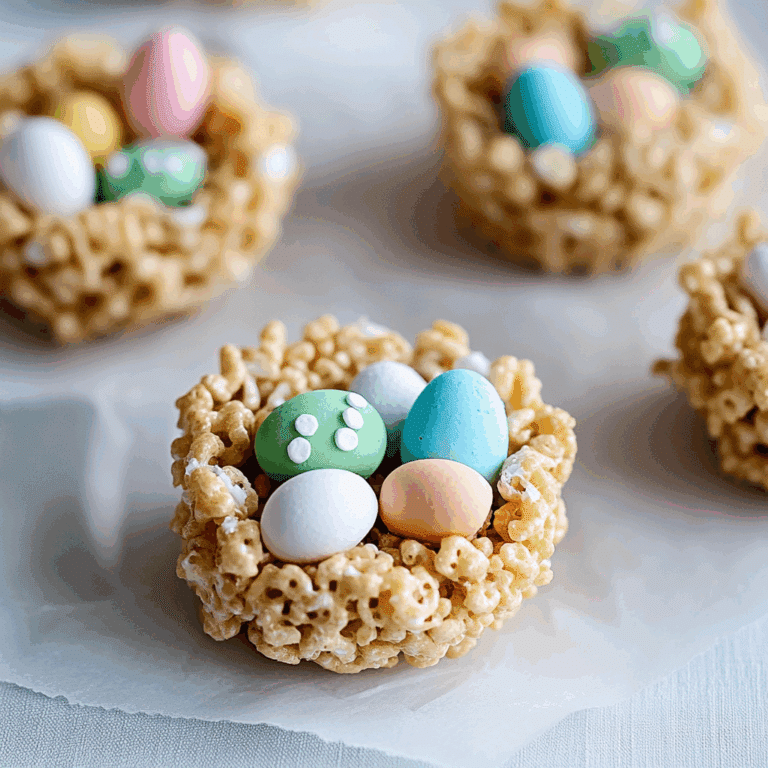
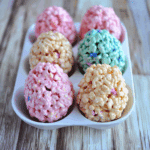
Easy Easter Rice Krispies Eggs Recipe Fun

Get ready to delight your family with a fun and festive treat that actually tastes as good as it looks! Easter Rice Krispies Eggs are a perfect way to bring a little joy to your holiday celebrations, combining the classic crispy, chewy appeal of Rice Krispies with colorful, egg-shaped charm. This recipe is wonderfully easy, kid-friendly, and quick to make, so you can create these sweet, marshmallowy Easter goodies in no time at all. Whether for classroom parties, Easter baskets, or just a weekend fun project, these Easter Rice Krispies Eggs are bound to become an instant favorite.
Why You’ll Love This Recipe
- Simple and Quick: Ready in under 20 minutes, making it perfect for busy holiday schedules.
- Kid-Friendly Fun: Great for kids to help shape and decorate, sparking creativity in the kitchen.
- Customizable Colors: Easily add food coloring or sprinkles to match any Easter theme.
- Delicious Texture: Crunchy yet chewy, offering a satisfying bite every time.
- Perfect for Sharing: Ideal for gifting or sharing at gatherings, bringing smiles all around.
Ingredients You’ll Need
The beauty of Easter Rice Krispies Eggs lies in their simple ingredients that come together to create big flavor. Each component plays a key role in the overall taste, texture, and festive look of these treats.
- Rice Krispies cereal: The essential crispy base that gives the eggs their signature crunch.
- Marshmallows: Melted marshmallows bind the cereal together and add that sweet, gooey chew.
- Butter: Adds richness and helps with melting the marshmallows evenly.
- Food coloring: Optional but fun for dyeing your marshmallow mixture or sprinkles for colorful Easter eggs.
- Sprinkles or edible decorations: Perfect for adding a festive touch on the exterior of each egg.
- Non-stick spray or butter: To grease hands during shaping, preventing sticky fingers!
Variations for Easter Rice Krispies Eggs
This Easter Rice Krispies Eggs recipe is wonderfully flexible—feel free to experiment and tailor it to your taste preferences, dietary needs, or available ingredients.
- Chocolate lovers twist: Add mini chocolate chips or drizzle melted chocolate on top for extra decadence.
- Peanut butter blend: Mix in some peanut butter with melted marshmallows for a nutty depth of flavor.
- Gluten-free swap: Use gluten-free crispy rice cereal to keep it safe for gluten-sensitive guests.
- Natural dye options: Use beet juice, turmeric, or spinach powder instead of artificial food coloring for a natural hue.
- Vegan version: Substitute vegan marshmallows and dairy-free butter to enjoy this treat animal-product-free.

How to Make Easter Rice Krispies Eggs
Step 1: Melt the Butter and Marshmallows
Start by warming butter over low heat in a large saucepan until melted. Add marshmallows and stir continuously until completely melted and smooth, forming the perfect sticky base for your eggs.
Step 2: Add Color and Mix
Stir in your choice of food coloring directly into the melted marshmallow mixture for vibrant, festive colors. Then, carefully fold in the Rice Krispies cereal until each piece is coated evenly and ready to shape.
Step 3: Shape the Eggs
Lightly grease your hands with butter or non-stick spray, then grab small handfuls of the mixture and mold them into egg shapes. Take your time to smooth edges or add gentle curves for that authentic egg look.
Step 4: Decorate Your Easter Rice Krispies Eggs
Add sprinkles, edible glitter, or even drizzle melted chocolate on your shaped eggs to personalize each one for extra flair and holiday fun.
Step 5: Let Them Set
Place your decorated eggs on wax paper or a greased tray and allow them to cool completely. This step helps your eggs firm up and hold their shape perfectly.
Pro Tips for Making Easter Rice Krispies Eggs
- Work fast: The marshmallow mixture sets quickly, so mix and shape immediately after combining.
- Use wax paper: Prevent sticking by shaping and cooling the eggs on wax or parchment paper.
- Grease your hands well: Butter your palms generously to stop the mixture from sticking as you shape the eggs.
- Combine colors carefully: If you want multi-colored eggs, divide the mixture before adding different colors for neat designs.
- Store in an airtight container: Keep your treats fresh and crunchy for days by sealing them properly after they cool.
How to Serve Easter Rice Krispies Eggs
Garnishes
Enhance your Easter Rice Krispies Eggs with festive garnishes like pastel-colored sprinkles, edible glitter, or candy eyes for added personality and charm.
Side Dishes
Pair these sweet eggs with fresh fruit platters, spring-themed cupcakes, or a light yogurt dip for balanced Easter snacking.
Creative Ways to Present
Arrange your Easter Rice Krispies Eggs in a decorated Easter basket lined with shredded paper grass, or place them on a tiered dessert stand for an eye-catching holiday centerpiece.
Make Ahead and Storage
Storing Leftovers
After your Easter Rice Krispies Eggs have completely cooled, store them in an airtight container at room temperature for up to 3 days to maintain their perfect texture.
Freezing
Wrap each egg individually in plastic wrap and place in a sealed freezer-safe bag to freeze for up to a month. Thaw at room temperature before serving.
Reheating
Reheating is not typically necessary, but if desired, microwave for a few seconds to soften before enjoying—just avoid overheating to prevent melting.
FAQs
Can I use a different cereal besides Rice Krispies?
Yes! You can substitute with other crispy cereals like corn flakes or gluten-free crisp rice, but the texture and flavor will vary slightly.
How do I store Easter Rice Krispies Eggs to keep them fresh?
Store them in an airtight container at room temperature away from moisture and heat to keep them crisp for a few days.
Is this recipe suitable for kids to make?
Absolutely! This recipe is great for kids with adult supervision, especially during the shaping and decorating steps.
Can I make these eggs vegan or allergy-friendly?
Yes, use vegan marshmallows and plant-based butter to make a vegan version. For allergies, substitute ingredients accordingly and choose safe decorations.
How do I get the marshmallow mixture not to stick to my hands?
Lightly grease your hands and the working surface with butter or non-stick spray to keep the mixture from sticking during shaping.
Final Thoughts
Easter Rice Krispies Eggs are more than just a treat—they’re a joyful way to bring family and friends together in the kitchen and at the table. Easy to make, customizable, and irresistibly tasty, this recipe will add a splash of color and fun to your Easter celebrations. So grab your ingredients, get shaping, and enjoy every sweet bite of this festive classic!
Related Posts
PrintEaster Rice Krispies Eggs
Easter Rice Krispies Eggs are a fun, festive treat combining classic crispy Rice Krispies cereal with gooey marshmallows, shaped into colorful egg forms perfect for holiday celebrations. Quick and easy to make, kid-friendly, customizable with colors and decorations, and deliciously crunchy yet chewy, these treats are ideal for Easter baskets, parties, or fun family projects.
- Prep Time: 10 minutes
- Cook Time: 5 minutes
- Total Time: 15 minutes
- Yield: About 12-15 eggs 1x
- Category: Appetizers
- Method: No-Bake
- Cuisine: American
- Diet: Gluten Free
Ingredients
Basic Ingredients
- 6 cups Rice Krispies cereal
- 4 cups mini marshmallows
- 3 tablespoons butter
Optional Ingredients
- Food coloring (as desired for dyeing marshmallow mixture)
- Sprinkles or edible decorations (for decorating eggs)
- Non-stick spray or additional butter (for greasing hands during shaping)
Instructions
- Step 1: Melt the Butter and Marshmallows
Start by warming 3 tablespoons of butter over low heat in a large saucepan until melted. Add 4 cups of mini marshmallows and stir continuously until completely melted and smooth, forming the perfect sticky base for your eggs. - Step 2: Add Color and Mix
Stir in your choice of food coloring directly into the melted marshmallow mixture for vibrant, festive colors. Then, carefully fold in 6 cups of Rice Krispies cereal until each piece is coated evenly and ready to shape. - Step 3: Shape the Eggs
Lightly grease your hands with butter or non-stick spray, then grab small handfuls of the mixture and mold them into egg shapes. Take your time to smooth edges or add gentle curves for that authentic egg look. - Step 4: Decorate Your Easter Rice Krispies Eggs
Add sprinkles, edible glitter, or drizzle melted chocolate on your shaped eggs to personalize each one for extra flair and holiday fun. - Step 5: Let Them Set
Place your decorated eggs on wax paper or a greased tray and allow them to cool completely. This step helps your eggs firm up and hold their shape perfectly.
Notes
- Work fast: The marshmallow mixture sets quickly, so mix and shape immediately after combining.
- Use wax paper: Prevent sticking by shaping and cooling the eggs on wax or parchment paper.
- Grease your hands well: Butter your palms generously to stop the mixture from sticking as you shape the eggs.
- Combine colors carefully: If you want multi-colored eggs, divide the mixture before adding different colors for neat designs.
- Store in an airtight container: Keep your treats fresh and crunchy for days by sealing them properly after they cool.
- For variations, try adding mini chocolate chips, mixing in peanut butter, using gluten-free cereal, natural dyes, or vegan substitutes.
Nutrition
- Serving Size: 1 egg (approximate)
- Calories: 150
- Sugar: 12g
- Sodium: 90mg
- Fat: 4g
- Saturated Fat: 2.5g
- Unsaturated Fat: 1g
- Trans Fat: 0g
- Carbohydrates: 28g
- Fiber: 0g
- Protein: 1g
- Cholesterol: 10mg
Keywords: Easter, Rice Krispies, marshmallow treats, kids recipe, holiday dessert, gluten free, no bake, festive snack