Why Waffled Grilled Cheese Is a Game-Changer
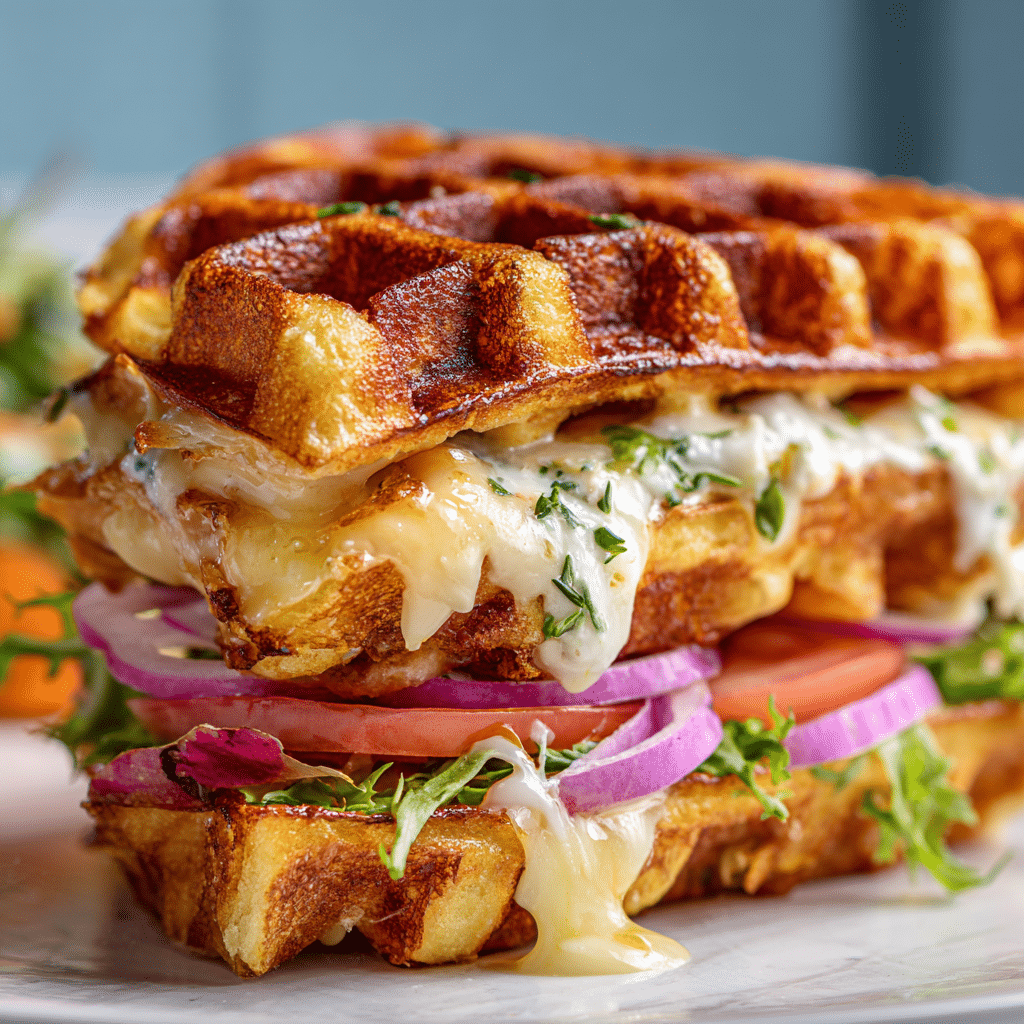
Discover the crispy, melty magic of Waffled Grilled Cheese, an easy twist that takes your sandwich game to the next level. This delightful take on the classic grilled cheese combines the perfect crunch from a waffle iron with the ooey-gooey goodness of melted cheese inside. Whether you are a casual snack lover or a grilled cheese aficionado, Waffled Grilled Cheese offers a fun, quick, and utterly delicious way to experience a comfort food favorite with newfound texture and flavor.
Why You’ll Love This Recipe
- A crisp, golden exterior: The waffle iron creates perfectly even browning and a satisfying crunch that’s hard to beat.
- Melty cheese perfection: The heat distribution ensures cheese melts evenly, creating pockets of gooey bliss in every bite.
- Quick and easy preparation: No need for a pan or flipping—just press and cook to golden perfection in minutes.
- Endless customization: You can add your favorite fillings or swap breads effortlessly for unique flavor profiles.
- A fun twist on a classic: It’s the comfort food you know, elevated with a fun and unexpected texture.
Ingredients You’ll Need
This recipe keeps it simple, focusing on fresh, quality ingredients that highlight the crispiness and meltiness of the sandwich. Each component plays a role, from bread structure to cheese flavor and even optional add-ins that can personalize your Waffled Grilled Cheese.
- Bread selection: Choose sturdy slices like sourdough or a thick white bread for the best waffle imprint and crunch.
- Cheese choice: Use melting cheeses like cheddar, American, or mozzarella for ideal stretch and creaminess.
- Butter or spread: A thin layer of butter or mayonnaise on the bread helps achieve a golden, crispy exterior.
- Optional fillings: Add tomatoes, ham, caramelized onions, or jalapeños for an extra flavor punch.
- Seasonings: A sprinkle of garlic powder or herbs can elevate the taste subtly but effectively.
Variations for Waffled Grilled Cheese
One of the best parts about making Waffled Grilled Cheese is how easily the recipe can be tweaked to suit your mood or dietary needs. From swapping breads to introducing new ingredients, the possibilities are endless and simple to try.
- Vegan vibe: Use plant-based cheese and vegan bread to make a completely dairy-free version.
- Spicy sensation: Add sliced jalapeños or a dash of hot sauce to the cheese layer for some heat.
- Sweet and savory twist: Incorporate sliced apples and sharp cheddar for a delicious contrast.
- Herb-infused: Mix fresh basil, thyme, or oregano into the cheese filling for a fragrant upgrade.
- Protein boost: Add turkey slices, bacon, or grilled chicken to turn it into a hearty meal.

How to Make Waffled Grilled Cheese
Step 1: Prepare Your Ingredients
Gather your bread slices, cheese, and any optional fillings. Butter one side of each bread slice evenly; this will be the outside that crisps up in the waffle iron.
Step 2: Assemble the Sandwich
Place one slice of bread butter-side down on a clean surface. Layer generous amounts of cheese and your chosen extras on top. Top with the second slice, butter-side up.
Step 3: Heat the Waffle Iron
Preheat your waffle iron until it’s hot and ready to give you that perfect golden brown finish.
Step 4: Cook the Sandwich
Place the sandwich inside the waffle iron and gently close it. Let it cook for about 3-5 minutes or until the bread is crisp and the cheese is melted.
Step 5: Remove and Serve
Carefully remove the Waffled Grilled Cheese from the iron using a spatula. Allow it to cool just slightly before slicing for the best melty, crispy combination.
Pro Tips for Making Waffled Grilled Cheese
- Butter it well: Don’t skimp on butter or mayo on the bread’s outside to ensure golden crispiness.
- Don’t overstuff: Too many fillings can make the sandwich soggy and difficult to cook evenly.
- Use medium heat: High heat might burn the bread before the cheese melts; medium heat gets the balance just right.
- Clean waffle iron promptly: Clean right after use to keep future sandwiches tasting fresh and prevent sticking.
- Experiment with bread types: Challah, brioche, and rye each create uniquely delicious outcomes.
How to Serve Waffled Grilled Cheese
Garnishes
Finish your Waffled Grilled Cheese with a sprinkle of fresh herbs like parsley or chives to add a burst of color and mild freshness that balances the richness.
Side Dishes
Pair it perfectly with tomato soup, a crisp side salad, or even crunchy pickles to create a complete and satisfying meal experience.
Creative Ways to Present
Try serving small Waffled Grilled Cheese squares as party appetizers or alongside homemade dipping sauces such as garlic aioli or spicy ketchup for an eye-catching twist.
Make Ahead and Storage
Storing Leftovers
Wrap any leftover Waffled Grilled Cheese tightly in plastic wrap or foil and store in the fridge for up to two days to maintain flavor and texture.
Freezing
You can freeze these sandwiches by wrapping them individually and placing them in airtight freezer bags for up to 1 month; just thaw in the fridge before reheating.
Reheating
Reheat leftovers in a toaster oven or regular oven at 350°F for 10-15 minutes to restore crispiness instead of microwaving, which can make the bread soggy.
FAQs
What type of cheese works best for Waffled Grilled Cheese?
Melting cheeses such as cheddar, American, mozzarella, or a blend make the best melty filling, but feel free to mix in your favorites for unique flavors.
Can I use gluten-free bread with this recipe?
Absolutely! Just select sturdy gluten-free bread varieties to get that crispy texture, as softer breads might not hold up as well in the waffle iron.
Is it necessary to butter the bread?
Yes, buttering or spreading mayonnaise on the outside is key to getting that beautiful golden and crispy waffle pattern instead of dry or pale bread.
Can I add protein to my Waffled Grilled Cheese?
Definitely! Adding cooked bacon, ham, or grilled chicken inside the sandwich is an easy way to make it a more filling meal.
How do I prevent sticking in my waffle iron?
Make sure to preheat the iron fully and use enough butter on the bread; you can also lightly oil the iron plates if sticking is a problem.
Final Thoughts
Waffled Grilled Cheese is a delightful, crispy, and melty twist on a classic favorite that’s easy to make and endlessly customizable. It turns a simple sandwich into something special and fun to eat. If you haven’t tried this game-changing recipe yet, now’s the perfect time to bring a little waffle magic to your grilled cheese routine!
Related Posts
- Why Bacon Chicken Ranch Wrap is a Must-Try Meal
- Why Jalapeño Popper Grilled Cheese Is Irresistible
- Easy Homemade Dinner Buns for Cozy Meals
Waffled Grilled Cheese
Waffled Grilled Cheese is a delicious and easy twist on the classic grilled cheese sandwich, featuring a crispy golden exterior from the waffle iron and perfectly melted cheese inside. This recipe offers a quick, fun, and customizable comfort food experience with endless variations to suit any taste or dietary need.
- Prep Time: 5 minutes
- Cook Time: 3-5 minutes
- Total Time: 8-10 minutes
- Yield: 1 sandwich 1x
- Category: Appetizers
- Method: Waffle Iron Cooking
- Cuisine: American
- Diet: Gluten Free (if using gluten-free bread)
Ingredients
Bread Selection
- 2 sturdy slices of sourdough or thick white bread (or gluten-free sturdy bread)
Cheese Choice
- Generous amounts of melting cheese such as cheddar, American, or mozzarella
Butter or Spread
- Thin layer of butter or mayonnaise for spreading on bread exterior
Optional Fillings
- Tomatoes, ham, caramelized onions, jalapeños, sliced apples, turkey slices, bacon, grilled chicken, or fresh herbs (basil, thyme, oregano)
Seasonings
- Garlic powder or herbs to taste
Instructions
- Prepare Your Ingredients: Gather your bread slices, cheese, and any optional fillings. Butter one side of each bread slice evenly; this will be the outside that crisps up in the waffle iron.
- Assemble the Sandwich: Place one slice of bread butter-side down on a clean surface. Layer generous amounts of cheese and your chosen extras on top. Top with the second slice, butter-side up.
- Heat the Waffle Iron: Preheat your waffle iron until it’s hot and ready to give you that perfect golden brown finish.
- Cook the Sandwich: Place the sandwich inside the waffle iron and gently close it. Let it cook for about 3-5 minutes or until the bread is crisp and the cheese is melted.
- Remove and Serve: Carefully remove the Waffled Grilled Cheese from the iron using a spatula. Allow it to cool just slightly before slicing for the best melty, crispy combination.
Notes
- Butter it well to ensure golden crispiness on the bread’s exterior.
- Do not overstuff the sandwich, as too many fillings can make it soggy and hard to cook evenly.
- Use medium heat to avoid burning the bread before the cheese melts.
- Clean the waffle iron promptly after use to prevent sticking and maintain flavor.
- Experiment with different bread types such as challah, brioche, or rye for unique outcomes.
Nutrition
- Serving Size: 1 sandwich
- Calories: 350-450 (depending on cheese and bread choice)
- Sugar: 2g
- Sodium: 550mg
- Fat: 20g
- Saturated Fat: 10g
- Unsaturated Fat: 7g
- Trans Fat: 0g
- Carbohydrates: 30g
- Fiber: 2g
- Protein: 15g
- Cholesterol: 45mg
Keywords: Waffled Grilled Cheese, grilled cheese, waffle sandwich, melty cheese, crispy sandwich, easy snack, comfort food, gluten-free grilled cheese